

We all hate punctures, they are perhaps annoying at best and a way to ruin day or yourself at worst. However, in this rapid fire guide we aim to help with a way of identifying the main types and causes of punctures, plus how to avoid them.
Some punctures are really obvious, depending on the type of riding you do, you’ll know what the cause was. However, there are many that are not as obvious and can go on to cause frustration if you can’t identify the cause and therefore the solution. In no particular order heres the 7 main types of punctures and how to identify them:
1. Foreign Objects (Glass / Nails / Screws / Thorns / etc)
Starting with The Classic almost by definition of a puncture. From a rapid loss of air, to a long drawn out slow puncture, foreign objects can pierce your tyres and tubes at any time. A whole manner of sharp, pointy and bizarre things will have a stab at your tubes from time to time.
Plus, depending where you ride your bike; you maybe more susceptible to a higher frequency of them that others.
You can get a puncture almost anywhere, however some places simply have more debris and as a result increase the chance of a puncture.
If it’s a fast puncture, chances are it’s something big. Bad news is it’s going down fast, good news is it should be easy to find and hopefully fix.
On the other hand, if it's a slow puncture chances are it’s something very small. Bad news is it can be harder to find, good news is you can hopefully (and safety) ride to a better place to get it sorted.
The key to resolving a foreign object puncture (if it’s not obvious) is once you find the puncture on the tube, you line up the tube with the tyre to locate exactly where said pointy thing ruined your ride and making sure it doesn’t happen again.
If you can find the culprit, it’s an easier puncture to deal with. Worst is fixing a tube and not removing the foreign object correctly, leading straight into another potential puncture and all new levels of anger!
2. 'Snake Bites' (Aka Pinch Flats)
Snake bikes, pinch flats, case flats, whatever you call them it could be argued they are the worst type of puncture. Why? Because they are self-inflicted. Plus, if you know you’ve done it, you’ll likely know your tube could be ruined.
So what is a pinch flat? Put simply; a pinch flat is caused by a heavy or immovable object coming into contact with your tyre with great force. For example, hoping up a curb or hitting a rock out on the trail. In most cases it mainly happens to the rear wheel only. Plus problem is increased when running low tyre pressures too either on purpose (MTB) or by accident (not maintaining your correct tyre pressures).
What happens? You hop up a curb (or over a rock etc), front wheel is up but you don’t lift the rear wheel enough (or not at all) and you quite literally ride it into the object. If you didn’t transfer your weight (and the weight of the bike) forward as you cleared your front wheel, you now have your forward momentum and a heck of a lot of weight propelling your wheel straight at the pointy edge of a curb, rock, etc.
The weight and force compresses your tyre until it can go no further. At this point it’s collapsed into the wheel rim, all with your inner tube sandwiched in-between.
The force of the curb edge connecting with your wheel rim puts huge pressure on the rubber in the middle. With the blunt force it slices your tube. If you’ve really hit it hard, you could also slice your tyre, flat spot (dent) your wheel rim and perhaps buckle your wheel.
You’ll feel a thud through your rear wheel, usually followed by the sound of rapidly escaping air. It’s not a difficult one to work out what just caused your puncture, however when you look at the tube the key characteristics are usually two small slices running parallel with your wheel.
Sadly, depending how bad you cased / bottomed out / down right slammed your wheel into the edge of something, the tube may not repair. In most examples the cuts can be just too long for an effective puncture repair.
What you'll see are the two matching little slices, hence the pinch flat / snake bite monica!
3. Spoke Head (Impression Cuts)
A somewhat rare of puncture these days. But if you get one and dont know the cause, you’re in for a treat. By treat, we mean, another puncture in the same place, usually in quick succession.
In many cases it’s a slow puncture caused by a protruding spoke head, spoke hole or rim join. Essentially it’s a puncture caused by your wheel where you tube sits into where it’s not inside the tyre.
Once you find the puncture on the tube and you see it’s more on the insider diameter, it’s a case of lining up the hole with the wheel (instead of the tyre, if the puncture was on the outer diameter more so.
A single walled rim will more likely have an issue with a spoke head. A double (or triple) walled rim will more likely have an issue with a sharp rim hole or swarf (depending on manufacture quality). As an outsider, it could be a spoke that is too long (for example if you’ve just trued your wheel and over tightened an already long spoke).
Good news is with a spoke head related puncture its a cheap fix (cutting down a spoke, removing swarf or getting a new rim tape) and hopefully it’ll never happen again! Plus it's usually an easy puncture to fix!
4a. Installation Error (cut/slice)
You’ve just fitted your new tube, went to inflate it and you’ve got a puncture. After the frustration and swearing has subsided, cyclists fall broadly into one of two categories. The first is the cyclist who knows they’ve made a mistake somewhere fitting the tube. The second is the cyclist who knows it couldn’t possibly be their fault and looks to apportion blame to someone or something else.
In many cases, using either the incorrect tools or using tools in an incorrect way leads to this sort of installation error. Usually characterised with a small cut, slice, or strange impression with a hole in it.
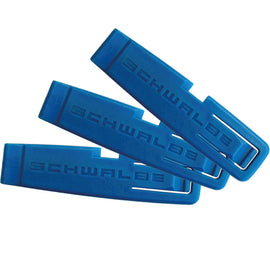
I’m sure we’ve all got caught in a pinch and tried to replace a tube using the ends of old spoons, knifes and pretty much anything else to hand except a proper pair of tyre levers.
A key giveaway of this mistake is the location of damage, usually close to the side of the tube where you’ve been jamming goodness knows what pointy thing in to refit your tyre. Even if the spoons you use are blunt, the pressure used in a very small area can be enough to separate the rubber. A proper, good condition tyre lever is not only made from the right materials but it’s also designed not to cause a kind of blunt force trauma to a tube!
Either way, if you’ve put a tube in a tyre and it has a puncture either slow or fast right away it’s 99.99% an installation error that has occurred. (Assuming everything else as wrote about above was not in play).
4b. Installation Error (BANG! Tube shredded!?)
Looking at the tube you may wonder what manner of savagery has caused this. Compared to all the other tyres of puncture, this one stands out there on its own, no other cause comes close to explaining away whats caused a shredded tube.
You see an inner tube must be constrained correctly else they will expand many times it’s designed size. Eventually, it will reach its elastic limit. The rubber becomes so stretched that; like a balloon, it will rupture at its weakest point. As the rubber is stretched so thin at its elastic limit, when it does let go, the tear is thrown open by the escaping air pressure.
In our case what has happened is when the tube was fitted a small piece of the tube (long or short) is trapped in-between the wheel rim and the tyre bead (the tyre edge). This unconstrained pieces of tube is now free to grow toward it’s elastic limit!
How has it become trapped you might wonder? Usually, when installing the tube instructions will tell you to add a little air to the tube first to help give it some shape. This air helps round out the tube, making it less likely to get caught unlike a flat piece of rubber stuffed under the tyre. If you don’t add the air as instructed, it’s very likely the tube will not be seated correctly.
Once the tyre/tube are fitted, the key is to add some air, spin the wheel and look for any bulging of the tyre (it should spin straight, true and level). If you see anything other, immediately deflate the tube and re-seat the inner tube.
However, many of us have made the mistake of fitting the tube wrong, not checking it and just inflating it.
If you’re lucky, you’ll spot the mistake and quickly deflate the tube! Else, the tube is sat their waiting to tear itself to pieces. It might happen as you’re inflating the tube, shortly after, even several hours, perhaps you’ll get a few hundred feet then, bang! If you’re lucky you won’t be in the room when it happens, but you’ll return to find a flat tyre and a shredded inner tube.
Before you say ‘the tear follows a seam it must be defective!’. Truth is, tubes generally don't have seams running along them, what they are a manufacturing shut lines from the mould. If you don’t believe us, look inside your shredded tube, you won’t see any seams on the inside that run around it! Yes, there is one seam but it runs across the tube.
Either way, it's not a tube that can be repaired sadly!
5. Valve Tear (Torn / Detached valve)
There are a few reasons behind this one. Sadly, a manufacture error isn't one of them:
6.1 The first is an issue with inflation technique. It can be more apparent with a directly mountable mini-pump head. Meaning the pump is directly attached to the valve without a flex. So if you're rough or applying force at an incorrect angle you can be putting significant force through the valve stem.
6.2 The second is incorrect pressures and fitment. This is more prevalent with MTB riders and low pressures. What happens is a tyre can slip around a rim and because the rubber of the tube is held against it, it can drag a tube as the tyre slips. The only thing stopping it is, you guessed it, the valve! So eventually what happens is one slip too many or too much force and it'll just sheer the valve off or drag it out of its seating where the bond was attaching it into the inner tube.
6.3 Lock nuts! Some tubes have them some tubes don't. However the little lock nut is designed to help hold the valve in place for when you attach your pump head and inflate your tyre. Some people mistakenly think these things are to be tightened using pliers, which is a big no-no. What happens is, if the valve nut is over tightened is it pulling the valve stem higher out of the rim and the inner tube inside with it. In time the stem will either fully detach from the inner tube or begin to tear at its weakest point (because of an over tightened lock nut). Either way, a puncture ensures and it can't be fixed sadly.
6. Valve Core (Slow puncture)
A leaking valve core, isn’t a puncture as such, but it can create a similar result as a slow puncture. If you can remember back to when you purchased your inner tube (if you’ve recently swapped out a tube) and saw it was slightly inflated, its a tell tale sign of a loose valve core.
Certain brands are more susceptible that others in our experience. But whether it’s a cheap tube or an expensive Smart Tube, out of the box some have loose valve cores. Plus it effects all valve types be it schrader, presta or woods.
So if you’re finding that you need to regularly keep inflating your tubes, but you can’t find a slow puncture, it maybe worth checking the valve core. If air is escaping, it will likely just need a slight twist nipping it up to make it air tight again, easiest way to do it is with a valve core tool.
7. Puncture Repair Error (Leaking patch)
Up there with one of the most annoying types of puncture that most cyclists have made from time to time is a fudged puncture repair. We’ve all tried to fix a tube in a hurry, if you do it wrong, the first time you find out is after you’ve just fixed your tube and went to inflate it (once you’ve put everything back on your wheel!).
Only to realise your patch didn’t hold and all that rushing just cost you all the time and way more that you were trying to save. It’s a pretty easy one to identify, you’ll see the patch didn’t fully bond to the tube and air is escaping. It can be due to the contact area being contaminated or not prepared properly, through to not enough time for the vulcanising rubber solution to cure and even that the type of puncture you’re repairing simply cannot be repaired!
Sometimes you ‘can’ doctor some types of the above issues, but in most instances the best thing is to remove it and start again.
Which is why the argument for always carrying a spare tube is a good one. The key is to replace the tube with a spare and repair the broken tube at a convenient point (When you’re not rushed!).
5 Key Things to remember:
- Never replace a tube without knowing the cause of the previous puncture.
- Always have a spare tube.
- Use the correct tools.
- Take your time.
- 99.99% of punctures are just bad luck or self-inflicted (not defective inner tubes).
We hope the above helps you avoid even one mistake or just helps highlight what the cause of the puncture you have might be (and how to solve it). Either way, if you do require a new tube or two, please have a look around. If you can't find what you need, either check out our guides on buying inner tubes, else simply get in touch, we'd love to help.