
10 Step Guide to Repairing a Bike Puncture
Knowing how to repair a bike puncture is an important part of cycling mechanics and will last you a lifetime if you learn how to do it early on and how to get it right.
Personally, the best solution to a puncture is to simply replace the tube altogether. That said it can be uneconomical, you might not have one on you and it's bad for the environment.
So with that said, let's get into it.
1. It's tyre lever time. First things first please do use proper levers not old spanners and spoons (because you'll likely create more holes!).
2. Get the tyre off the rim (check out or guide for changing an inner tube to help if needed).
3. If you can find the hole on the bike, it's best to do that as it saves time. Else if you can't you'll need to get the tube fully off the bike wheel. If thats the case grab a pump put a few blasts of air in it and get it under water in the sink. You'll need to dip 6-8 inches underwater at a time slowly spinning the tube all the way around and hopefully you'll see some bubbles appear. Where the bubbles appear is where the problem is. At this point you may think 'Ah-ha!' got it, but please check the rest of the tube as its not uncommon to have multiple punctures.
4. Noting which way the tube came off the tyre is essential in finding what caused the puncture in the first place. If the hole is on the inside diameter of the tube, you may be looking at a sharp spoke head (a self inflicted puncture). Else if there are two tiny slits on the width of the tube, you've got whats called a 'snake bite puncture' (these are tricker to fix). Finally if it appears to be a regular puncture you need to find where the hole in relation to how the tube came off the tyre. This is because it will point out where the puncture happened and 9 times out of 10 the culprit is still buried in the tyre rubber, you 100% need to find this and get it out.
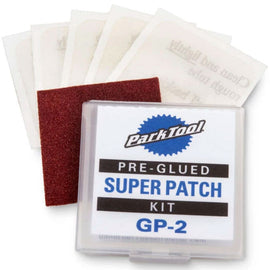
4. Dry tube? Good. Repair kit to hand now. Get the sand paper and give the area around the hole a light sanding. A few inches in diameter will do, you need to sand the rubber enough to scratch up the surface for the glue to grip onto (more scratches, more surface area, more surface area, more grip).
5. Sand paper away, it's glue time. Start over the hole and slowly squeeze the glue out while drawing circles to be 5mm larger than the patch you're going to use. Next put glue on the patch itself too. The glue is actually a vulcanising rubber solution (yes thats what they call it) and it somewhat primes both rubbers to adhere together with a bit of a melting action.
6. Leave them for a couple of minutes and then sandwich them together nice and firmly. Press down across all of the patch and make sure it's all contacting nicely.
7. Chalk time. If you're in a rush (and want to do things properly) grate the chalk over the patch and remaining glue are, this helps drying it and removes any tendency for the tyre to grip what is now a raised up patch on the tube.
8. All dry? Good. Whatever it says on the repair kit for drying time, do stick to it else your undoing all your hard work. Re-inflate the tyre before putting it back on the bike (if you took it off) just in case its not fixed properly.
9. Put everything back together, get the pressure up to the manufacturers recommendation (see the side of your tyre) and you're done. That said it is worth slowly spinning the tyre and having a listen with your ear close incase things have not gone to plan.
10. If at any stage things go wrong, just remember that punctures do just happen and you'll make mistakes in repairing them (usually rushing). So it's best to take your time, be deliberate and methodical and get it right once. Else you'll be swearing your head off all over again, like when you heard the 'psssst' sound the first time (or you found your bike with a flat in the garage!).